


My son Adam had a jumbo Ziploc in his cooler, stuffed full of Walleyes just waiting to meet the pan…
Luckily, my friend Laura who considers herself somewhat of a walleye aficionado was along for the camp out and gave us some tips on cooking with cast iron. Mind you Laura is no fish snob! Pan fish–crappies and sunnies–often grace her table, but she makes no bones about it, walleye to her is the crème de la crème of fish!
Laura has some tricks when it comes to preparing her fish! One thing she insists is fish must be fried in cast iron pans. We had two skillets for a fish fry for twenty. Laura would never consider camping without them. So began my education on the fine art of caring and cooking on cast iron pans. For those who camp light, lugging a heavy pan is clearly not practical, but for those who have transportation relatively close to where your tent is pitched, consider adding a pan to your camping gear box. It’s great for cooking over a campfire! Oh and for the record, Laura’s wet battered walleye fillets, fried in the depths of her black cast iron cookware were crispy, moist, and tender!
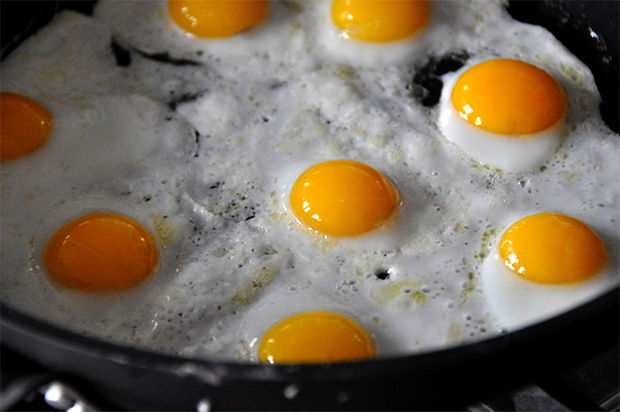
Laura shared she likes cast iron’s ability to withstand and maintain very high but even cooking temperatures. She uses her pans for searing or frying. Due to its excellent heat retention cast iron is her choice for long-cooking stews or braised dishes. Because cast iron skillets, if handled properly, develop a “non-stick” surface, that makes them good for cooking egg dishes too. Laura also uses her cast iron pans for baking cornbread, cobblers and cakes, and has been doing so for over forty years.

Upon my return from the bush I continued my cast iron education. What I discovered is cast iron is inexpensive and will last a lifetime if you take care of it! It is a way to cook fat free and strengthens wrists. One thing my subsequent research revealed, don’t cast off old cast iron cookware that belonged to your mother or grandmother! Clean it! As long as it has no cracks or nicks, you can clean, season, and use it again for years.
A seasoned pan has a stick-resistant coating created by polymerized oils and fats. For those of us who are not chemistry majors, “polymer” is a natural or synthetic compound that consists of large molecules made of many chemically bonded smaller identical molecules, e.g. starch and nylon. Pan seasoning is a process by which a layer of animal fat or vegetable oil is applied and cooked onto cast iron. The seasoning layer protects the cookware from rusting, provides the non-stick surface for cooking, and prevents food from interacting with the iron of the pan.
Some chefs advise cast iron cookware should be re-seasoned annually to ensure a non-stick surface and to protect the surface from rust. The surface should be smooth as glass to the touch. I found a perfectly acceptable 12 inch cast iron pan at my local Goodwill. You can find cast-iron pans and skillets at thrift stores, flea markets, Craig’s List, E-bay, or at neighborhood garage sales. The top brands of cast-iron pans and skillets are Griswold, Wagner, and Lodge. If the pan is rusty or showing some grease, don’t despair.
Because ordinary cookware cleaning techniques like scrubbing or scouring or washing in a dishwasher can remove or damage the seasoning on cast iron pans, these pans should not be cleaned like most other cookware. Some cast iron lovers advocate never cleaning cast iron pans at all, simply wipe them out after use, or wash them in hot water with a stiff brush. Others advise washing with mild soap and water, and then re-applying a thin layer of fat or oil. Another approach is to scrub with coarse salt, rinse and dry thoroughly.
I read that the majority of brand new skillets come pre-seasoned by the manufacturer. While you should always take steps to maintain the seasoning, there may be times that you will need to repeat the seasoning process. If you are starting with a brand new unseasoned skillet, follow the process below before you begin using your cookware.
The only time some advise you to use soap on your cast iron, is when you want to strip it completely clean. Thoroughly rinse the skillet with hot water to remove all of the soap residue prior to seasoning. If you are re-seasoning the surface due to stuck-on food particles, rust, or uneven color, use a brush, scouring pad or steel wool for an even, clean surface. Dry thoroughly. To season my new “used” Goodwill pan I used a thin layer of melted “vegetable” shortening. Cover every part of the skillet inside and out. Avoid using low-smoke point oils such as extra virgin olive oil or butter.
Preheat oven to 400° degrees. Line a cookie sheet with foil or use a large disposable foil roaster and place the cookware face down on the cookie sheet or roaster. Place on the top rack of the oven. The aluminum foil will catch the oil drippings. Bake the cookware for at least one hour. Open a window and disarm the smoke alarm if necessary. Turn off the oven and allow the cookware to cool to room temperature in the oven for several hours more. Store cookware in a cool dry place. Thinly coat the cookware with cooking oil in-between uses to maintain seasoning.
Cast iron typically takes a bit longer to preheat than standard stainless pans. When possible heat pans slowly over low heat, and then adjust to your desired cooking temperature.
Laura uses “water balls” to determine if her cast iron skillet is ready to start frying. She heats her pan on medium heat until a drop of water sizzles and balls as soon as it hits the surface of the cast iron. Handles become extremely hot! Always use an oven mitt or potholders when handling cast iron. There are handle mitts that slip over the handles, they can be found online and at restaurant supply houses. A recommended precaution that protects not only your hands, but other hands that may go to move a “cool” pan. Cookware can be placed on top of a trivet or towel on the serving table, keeping food warm through the meal service.
Dry the cookware thoroughly after cleaning. If you used the oven, stick the pan in the cooling, still-warm oven for awhile or heat it on the campfire grate or stovetop for a few minutes to make sure all the moisture is removed. Apply a thin layer of cooking oil to the surface while the pan is still warm. Store cookware in a cool, dry place. Storing the pan in the oven is a viable option. Remove the pan prior to turning on the oven. If your pan has a lid, store the pan and lid separately, or place a folded piece of paper towel between the lid and the pan so the pan is ventilated. Cooking with cast iron is great, especially if you know how to do it!


